
DIY Projects
DIY project: Captain's mirror

DIY project: Captain's mirror
DIY Projects
DIY project: Captain's mirror
How to make your own captain's mirror to save on cost, but not style.
A captain's mirror exudes luxury and looks great as a stand-alone or in a series. It's simple and classic and has become a decorator's first mate. Here's a DIY mirror project to create your own budget-friendly version of the popular wall decor.
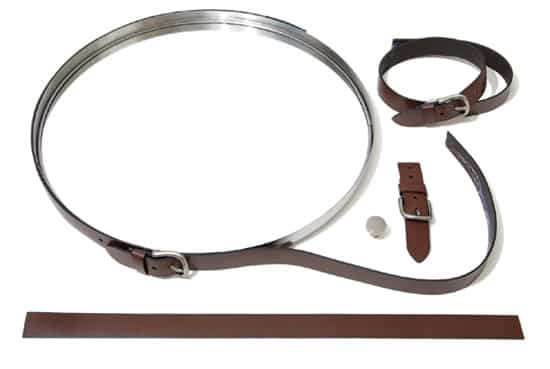
Materials
- IKEA Grundtal mirror (hanging materials required)
- 3 long leather belts 1-1⁄2" thick (to match thickness of mirror frame)
- Shears
- Glue gun
- Knob

Instructions
1 Lay the mirror face down on a flat work surface. There are crossbars on the back that you will use as guides; picture the mirror as a clock.
2 Run your first belt along the bottom half of the mirror. Using shears, cut off the ends of the belt at the mirror's 3- and 9-o'clock marks. Hot glue in place. Set extra belt pieces aside.
3 Repeat with the second belt on the mirror's top half, ensuring that the ends of the second belt butt up against the first.
4 Take the third belt and trim as close as possible to the buckle; fasten the buckle to the belt's tail end (this will form the mirror's decorative strap).
5 Hot glue the buckled end of the decorative strap at the 3-o'clock mark on the mirror; hot glue the cut-off end of the strap at the 9-o'clock mark.
6 Using the remnants of the first belt, fasten the buckle to the tail end. Trim excess belting from either side. Hot glue it at the 9-o'clock mark.
7 Repeat step 6, using the remnants of the second belt and gluing at the 6-o'clock mark.
8 Secure the mirror to the wall as instructed.
9 With your finger, pull the decorative strap up taughtly; mark an X at your fingertip. Secure the knob at the X. Drape the strap over the knob.
Comments